Its that time of year when most of us that have grown a garden have way too much spinach. Here is a way to put up that spinach for future use. This article was written by simply canning:
Freezing Spinach
and other greens
What you choose to pack in is personal choice. I used quart size freezer bags. If you pack in freezer containers you will not be able to remove air as well and run the risk of freezer burn.
Freezer boxes work best for things that are frozen wet in a syrup. Spinach is frozen blanched and dry.
A quart of spinach is too much for us to use at a time. The way I like to freeze spinach is in smaller quantities, a cup or so.
I wrap those in inexpensive sandwich baggies then store several of these in a quart size or even gallon size freezer bags.
freezing spinach That way I still get the heavier plastic made for the freezer from the quart bags. But the smaller less expensive bags hold the amount we need.
I use fresh spinach in my green smoothies. I am going to try using the frozen spinach to make smoothies this winter when I am longing for fresh garden foods.
Freezing Spinach
First harvest your spinach early in the morning when it is at its freshest.
Rinse the spinach well. Sorting out any weeds, browned or damaged leaves or other things (bugs) that might have gotten mixed in.
Spinach will often have dirt hiding in its leaves so you need to rinse well. I'll rinse and drain several times before I am content that all dirt, bugs or dead leaves are taken care of.
freezing spinach rinsing
Blanching
Spinach and other greens need to be blanched before freezing. This helps retain the color and nutrition.
Bring enough water to cover your spinach to a boil. I use my blancher but a large pot will work as well. When the water is boiling throw in the spinach.
freezing spinach blanching
Start timing right away for 2 minutes. As soon as time is up remove spinach to a bowl of very cold or even ice water.
freezing spinach cooling
This stops the cooking. The spinach will have reduced in mass somewhat but not as much as you might think.
The last step is to drain the spinach and dry. I have a salad spinner that I use to spin the water off. If you don't have one you can simple drain in a colander then spread out on paper towels and blot dry.
freezing spinach drain
My good friend Cindy has a great method of spinning her salad that I think would work here too. Drain your spinach then place in a tea towel. bring up the corners of the towel forming a sort of sack of spinach. Give it a whirl. Go ahead and spin it around. The water will be spun out into the towel.
Now package the spinach in whatever freezer containers you prefer. Here are my smaller baggies of spinach. I flatten the spinach out in the baggie and squeeze out as much air as possible.
freezing spinach baggies
Here is my labeled quart bag. It has 2 sandwich baggies inside with room for a couple more.
freezing spinach bag
Remove as much air as possible. Label, seal and freeze. Freezing spinach is super easy!
Tuesday, June 22, 2010
Latter day Prophets speak on preparedness
Latter-day Prophets Speak on Preparedness
“Latter-day Prophets Speak on Preparedness,” Ensign, Aug. 2007, 33
Gordon B. Hinckley (1910–)
Fifteenth President of the Church
“The best place to have some food set aside is within our homes, together with a little money in savings. The best welfare program is our own welfare program. Five or six cans of wheat in the home are better than a bushel in the welfare granary. …
“We can begin with a one week’s food supply and gradually build it to a month, and then to three months. I am speaking now of food to cover basic needs” (“To Men of the Priesthood,” Ensign, Nov. 2002, 58).
Ezra Taft Benson (1899–1994)
Thirteenth President of the Church
“The revelation to store food may be as essential to our temporal salvation today as boarding the ark was to the people in the days of Noah” (“Prepare Ye,” Ensign, Jan. 1974, 69).
Spencer W. Kimball (1895–1985)
Twelfth President of the Church
“We encourage you to grow all the food that you feasibly can on your own property. Berry bushes, grapevines, fruit trees—plant them if your climate is right for their growth. Grow vegetables and eat them from your own yard. Even those residing in apartments or condominiums can generally grow a little food in pots and planters. … Make your garden as neat and attractive as well as productive. If there are children in your home, involve them in the process with assigned responsibilities” (“Family Preparedness,” Ensign, May 1976, 124).
Harold B. Lee (1899–1973)
Eleventh President of the Church
“We expect the individual to do all he can to help himself, whether it be an emergency for a single family or for a whole community, that the relatives will do all they can to help, then the Church steps in with commodities from the storehouse, with fast offerings to meet their needs that commodities from the storehouse will not supply, and finally, the Relief Society and the priesthood quorums will assist with rehabilitation” (Teachings of Presidents of the Church: Harold B. Lee [2000], 171).
Joseph Fielding Smith (1876–1972)
Tenth President of the Church
“[The pioneers] were taught by their leaders to produce, as far as possible, all that they consumed, and to be frugal and not wasteful of their substance. This is still excellent counsel” (“The Pioneer Spirit,” Improvement Era, July 1970, 3).
Wilford Woodruff (1807–98)
Fourth President of the Church
“We feel led to caution the Latter-day Saints against forming the bad habit of incurring debt and taking upon themselves obligations which frequently burden them heavier than they can bear, and lead to the loss of their homes and other possessions. … Our business should be done, as much as possible, on the principle of paying for that which we purchase, and our needs should be brought within the limit of our resources” (Teachings of Presidents of the Church: Wilford Woodruff [2004], 232–33).
George Albert Smith (1870–1951)
Eighth President of the Church
“How on the face of the earth could a man enjoy his religion when he had been told by the Lord how to prepare for a day of famine, when instead of doing so he had fooled away that which would have sustained him and his family” (Deseret News, Mar. 4, 1868, 26).
Brigham Young (1801–77)
Second President of the Church
“If you are without bread, how much wisdom can you boast and of what real utility are your talents, if you cannot procure for yourselves and save against a day of scarcity those substances designed to sustain your natural lives?” (Deseret News, July 18, 1860, 153).
Pie Crust
Dont know about you guys, but for all the things I "can" do....I cant make a pie crust to save my life. But I came across a great post found at www.homesteadhomemaker@blogspot.com that has a great tutorial. Crystal always has a way of making things look so easy. Thought I would share it!
Whole Wheat Pie Crust
I love making pies! I never use to as much, mostly because of making the pie crust. I was not happy with the whole wheat pie crusts I was coming up with. I did not want to use shortening so at first I subbed butter for the shortening. That was not too bad, but could be hard to work with sometimes. Then I tried olive oil. That was ok too.. but finally I tweaked a recipe and played around with it until I came up with something that I absolutely love now! I use both butter and coconut oil. I also make the pie crust in my Bosch. If you have a Kitchen Aid that will work too. One lady told me she has also done it by hand with success. In my directions below I am using my Bosch.
The recipe makes 4 crusts. If this is more than you want at one time, the
remaining crusts can be refrigerated for up to two weeks or frozen. Wrap the unused pie crust dough pieces in plastic wrap and store in your fridge or freezer. If you refrigerate or freeze them make sure you let them come to room temp before trying to roll them out.
You can find the recipe here:
http://www.thefamilyhomestead.com/wwpiecrustbosh.htm
My daughter Sierra made the crust while I too the pics...
Begin by gathering your ingredients together:
If your flour is freshly ground you will need to pack the cups with flour
because freshly ground flour is light and fluffy and you need the full amount of flour for this to work.Add the flour to your mixer bowl:
Add the salt:
Mix this together:
Now add the coconut oil and butter. Make sure your butter is room temp:
Begin by using the wire whips to mix the flour and coconut oil and butter. Mix them until you have a crumbly looking mixture:
Measure out the cold water in a measuring cup. Add the vinegar and egg and mix well:
Change from the wire whips to the dough hook in your mixer. Add the
water/vinegar/egg mixture:
Mix this in your mixer on low speed until the dough has been cleaned off the side of your bowl. This process can take 3 or 4 minutes. If you find your dough is too dry or stiff you can add more water, a teaspoon at a time until the dough is nice and soft. If it is too moist add flour a teaspoon at a time until the dough is nice and soft:
Take the dough out of the bowl and divide it into 4 balls:
Now it is time to roll out the dough. I use plastic wrap for this….
Lay a sheet on the counter:
Flatten one of the dough balls and set it in the center of the plastic:
Lay a second sheet of plastic wrap over the dough:
Now begin to roll the dough out. Start at the center and roll outward in all directions, keeping the dough as round as possible:
To see if your circle of dough is big enough set the pie plate over the dough:
When the circle is the right size it is time to put it in the pie plate. Peel off the top layer of plastic wrap:
Lift the bottom layer off the counter and slide your hand under it and lift it up:
Now lay the pie plate upside down on your hand, centering it in the middle of the dough:
Flip the pie plate and dough over. Realign the dough if it is off center:
Now remove the plastic wrap:
Now pick up the pie plate and using a butter knife go around the edges of the pie plate to clean off the dough that is hanging over the edge:
If you have an area on the crust that does not cover the pie plate:
Take a piece of the dough that you cut off and cover the spot. Then scrape off the excess that is hanging over the edge:
Now you can leave the pie dough as is or you can make the rim a little fancy. Holding two fingers on the inside edge, squeeze the dough together as you push the dough in with another finger on the outside of the edge to give you fluted look:
There you have it.. your dough is ready to be filled with whatever type of pie filling you desire!!
On the night that we made this pie crust we made an apple pie. The recipe for the apple pie can be found here:
http://www.thefamilyhomestead.com/favapplepie.htm
Begin by peeling and slicing the apples:
Stir in the remaining ingredients:
Fill your pie shell with the filling:
Make the topping mixture:
Cover the top of the pie with it:
Bake your pie and enjoy!
Monday, March 1, 2010
This is a great recipe for sourdough starter. Having this on hand really makes good use of your food storage and is wonderful for digestion, not to mention your pocketbook! And its yummy!!!
Sourdough Starter
08:55, 2006-Apr-26 .. 3 comments .. Link
*******************************************
About 5 days ago I started a batch of sourdough starter. I am using Sally Fallon’s recipe from her book Nourishing Traditions. She uses equal parts freshly ground rye berries and water.
I started with 2 cups of each (per her instructions) I ground the rye berries up in my mill...
and mixed with water in a bowl......
Then poured into a gallon size glass jar. I put a double layer of cheese cloth over the top and secured it with a rubber band.
After 24 hours I poured the whole mix into a clean bowl and fed my starter with 1 cup freshly ground rye berries and 1 cup water and poured it all into a new clean gallon size jar.
I have been repeating these steps each day. At the end of 7 days, which will be this Wednesday, I will be ready to use it in various recipes. I plan on trying out her bread recipe and maybe do a bit of experimenting on my own.
After one week, you can put it in the refrigerator in an air tight jar and feed it less often, unless you are using regularly then you can feed it daily. Sourdough that is fed and cared for can last for years. I am not sure how long mine will last as I have done this once before and kept it going for awhile before I forgot all about it! I will keep you posted on my progress!
Our food co-op president just sent out an e-mail about making sourdough bread...an interesting tip I hadn't heard before is to put the loaf in boiling water for a minute before baking, as you would bagels or soft pretzels. Apparently this helps give that chewy outer crust characteristic of the good sourdoughs. I haven't made any yet but will be attempting it soon.
.
Muffins Galore. Make ahead mix!
Make ahead muffin mix
8 cups all-purpose flour
2/3 cup sugar
1/3 cup baking powder
1 tablespoon salt
1 cup vegetable shortening
In a large bowl, combine dry ingredients. With a pastry blender, cut shortening into dry ingredients until evenly distributed. Put in a large airtight container. Store in a cool, dry place. use within 3 months. Makes 10 cups of muffin mixMELT IN YOUR MOUTH MUFFINS
2 1/3 cups of muffin mix
1 egg, beaten
1 cup milk
Preheat oven to 400 degrees.
Put muffin mix in a medium bowl. Combine egg and milk in a small bowl, add all at once to muffin mix. Stir just until mix is moistened. Batter should be lumpy
Fill greased pans 2/3 full (or use cupcake liners). B ake 15 to 20 minutes, until golden brown. Makes 12 large muffins.
JELLY/JAM MUFFINS
Fill each cup 1/3 full with batter. Drop 1 teaspoon jelly or jam on top of batter, fill cups 2/3 full with more batter.
CHEESE MUFFINS
Add 1 cup grated Cheddar cheese to Muffin Mix before adding liquid ingredients
APRICOT MUFFINS
Add 1 cup chopped dried apricots to liquid ingredients before adding liquid.
BANANA MUFFINS
Add 1/4 tsp cinnamon and 1/4 tsp nutmeg to muffin mix. Mash 1 banana and add to liquid ingredients before adding liquid to mix.
BLUEBERRY MUFFINS
Add 1 cup well-drained blueberries to liquid ingredients before adding to muffin mix.
PINEAPPLE MUFFINS
Decrease milk to 2/3 cup. Add 1 cup crushed pineapple with juice to liquid ingredients before adding to muffin mix
BUTTERSCOTCH-PECAN MUFFINS
Melt 6 tablespoons butter/margarine. Stir in 6 tablespoons brown sugar. Place 1 tablespoon of brown sugar mixture and 2 -3 pecans in bottom of each muffin cup. Fill cups 2/3 full with batter.
__________________
APPLE MUFFINS
2 1/3 cups muffin mix
1/2 cup chopped nuts
1/4 teaspoon cloves
1 cup sweet applesauce
1/4 cup milk
1 egg, beaten
Preheat oven to 400 degrees
Combine muffin mix, nuts and cloves. In another bowl, combine applesauce, milk and egg. Add all at once to dry ingredients. Stir just till moistened. Fill greased pans 2/3 full
Bake 15-20 minutes. Makes 12 large muffins
CRANBERRY CAKES
Sweet, tart & irresistible
1 cup raw whole cranberries
1/2 cup sugar
2 1/3 cups muffin mix
1 cup evaporated mil,
1 tablespoon melted butter or margarine
Hot Butter Sauce
Preheat oven to 400 degrees. Generously grease muffin pans.
Combine cranberries and sugar and let stand a few minutes.
Put muffin mix in a medium bowl. Add evaporated milk and butter to sweetened cranberries. Add cranberry mixture all at once to muffin mix. Stir just until moistened-batter will be lumpy. Fill prepared pans half full. Bake 15-20 minutes until golden brown. Serve hot with warm butter sauce. Makes about 24 cakes.
Hot Butter Sauce
1/2 cup butter
1 cup sugar
1 cup cream or evaporated milk
Dash of nutmeg
Combine butter, sugar and cream or evap milk in small saucepan. Cook over medium heat about 3 to 5 minutes, until butter melts and sugar is dissolved. Do not boil. Remove from heat. Add nutmeg. Serve warm.
Makes about 1 1/4 cups sauce.
Monday, February 22, 2010
What to do with 25lbs of Oats
There is a wonderful website TheFamilyHomestead.com and she had this article I wanted to share.
What to Do with 25lbs of Oats
by Crystal Miller

Buying grains in bulk quantities (25 or 50lb bags) is a great way to save money. Oats are a great food source and low in cost. They are high in vitamins B1 and E and also contain protein and many other valuable minerals that our bodies need. They have the most soluble fiber of any grain. They also help to stabilize blood sugar. What a great economical source of health providing food to feed your family!
Now that you know how great oats are for your health and your budget what are some ways to use this power packed food?
Oats are a great choice for breakfast! Cold breakfast cereals can be very hard on a budget and feeding oatmeal for breakfast is a great alternative.
Our Breakfast Oatmeal
Oatmeal is a breakfast that my children see often, especially in the winter months where a hot breakfast feels so good. It warms the insides and starts the day off right. I always serve oatmeal with toast made from my homemade bread.
Basic recipe, adjust to feed your family
1 cup water
½ cup oats
pinch of salt
Bring water and salt to a boil, add oats. Cook 5 minutes for quick oats and 10 to 15 minutes for regular oats. Serve with real maple syrup or honey to sweeten a bit and milk. Raisins and cinnamon added are optional. My son likes to stir in a big spoonful of peanut butter into his oatmeal.
If you want to improve the nutritional aspect of your oatmeal you can soak it the night before. I do this quite often. Combine water and oats in a cooking pot and add 1T yogurt, kefir, or whey for every cup of water. Let this soak overnight and in the morning add salt and cook oats. Soaking any grain before cooking allows for better absorption of the nutrients.
Besides oatmeal I have a few more favorite breakfast recipes that use oats:
Homemade Instant Oatmeal Mix http://www.thefamilyhomestead.com/instantoatmix1.htm
Baked Oatmeal http://www.thefamilyhomestead.com/bakedoatmea1.htm
Oatmeal Pancakes http://www.thefamilyhomestead.com/oatmealpancakes.htm
Overnight Cinnamon Oatmeal Pancakes http://www.thefamilyhomestead.com/cinnoatpancakes1.htm
Cinnamon Oat Waffles http://www.thefamilyhomestead.com/cinnoatwaffles.htm
Raisin Oatmeal Scones http://www.thefamilyhomestead.com/raisinoatscones.htm
Granola http://www.thefamilyhomestead.com/granola1.htm
Peanut butter Granola http://www.thefamilyhomestead.com/peanutbuttergranola.htm
Stir a couple of tablespoons oats into a cup of yogurt
Oats can be added to baked goods. They are great in breads, muffins and cookies. Here are some of my favorite recipes:
Oat Dinner Rolls http://www.thefamilyhomestead.com/wwoatdinnerrolls.htm
I really love this recipe. The rolls also make great hamburger buns. If I want to use them for hamburger buns I make 18 rolls instead of the 24 the recipe calls for in dinner roll form. I also will often use this recipe to make cinnamon rolls.
Leftover Oatmeal Make too much oatmeal for breakfast? No problem!
Leftover Oatmeal Muffins http://www.thefamilyhomestead.com/leftoveroatmealmuffins.htm
Leftover Oatmeal Cake http://www.thefamilyhomestead.com/leftoveroatmealcake.htm
Cookies and Cakes Oats are wonderful addition to cookies and cakes. Here are my favorites:
Oatmeal Cookies http://www.thefamilyhomestead.com/oatmealcookies.htm
Big Batch Oatmeal Raisin Cookies http://www.thefamilyhomestead.com/oatmealraisincookies.htm
Peanut butter Oatmeal Cookies http://www.thefamilyhomestead.com/peanutbutteroatcookies.htm
Cowboy Cookies http://www.thefamilyhomestead.com/cowboycookies.htm
Oatmeal Spice Cake http://www.thefamilyhomestead.com/oatmealspicecake.htm
Other Ways to use oats:
~You can use oats in place of cracker crumbs or bread in foods like meatloaf and meatballs.
~You can use oats to thicken stews and soups
~In baking you can replace up to 1/3 of the flour called for in a recipe with oats
~Add a 2 to 4 Tablespoons of oats to your next smoothie
~Ice Cream Sandwiches: Make a batch of oatmeal cookies and let them cool. Take vanilla ice cream and spread thickly on one cookie and top with a second cookie, freeze.
There are a few uses of oats that are not food related, but health related. Oats help to smooth and soften skin. They can also be helpful with eczema as well as itchy skin. Take an oatmeal bath! Put oats into a muslin bag or even an old nylon that has been washed and cleaned and tie this to the spout of your tub. As the water fills the tub it will run through the oats. Or you can boil a cup of oats in 2 quarts of water for a few minutes, stain out the oats and add the water to your bath.
A Few More Tidbits of Info on Oats
You can buy regular or quick cooking oats and typically use them interchangeably in recipes. The only difference between the two types is how thin they have been rolled. There are other varieties of oats such as “Scottish” oats which are very thick cut and may not work well in baking. Steel cut oats are the oat groat (the oat grain) that are cut in small pieces. They are great for a breakfast cereal but do not work well in other applications such as baking and cooking.
In the mid 1880’s here in the US, a German grocer in Ohio began hulling and selling oats to his fellow immigrants. At the time the main staple for breakfast in the Midwest was typically meat, eggs and potatoes, fruit. For most immigrants this was beyond what they could produce. Oats were mainly considered horse food, not people food when this Ohio grocer began selling it. He was ridiculed and made fun of for selling them! And today, oats are looked at as a very important part of a healthy diet.
Incidentally in a town that was not far from the first milling of oats a group of 3 men began doing the same thing as the German grocer. But instead of selling their steel cut oats in bulk they put them in a nice box, added cooking directions and called their product “Quaker Oats”.
So as you can see oats are a healthy and delicious way to help you stretch your grocery budget and provide good quality food for your family.
Bulk Taco Seasoning Mix
Bulk Taco Seasoning Mix
We are having taco salad for dinner tonight. I always cook up my hamburger and add taco seasonings to it before adding it to my salad. I realized this morning I was out of taco seasoning and it was time to make more. This is another product that I make myself now. We are not real big fans of the taste of the taco seasonings I at the store. A recent article I read said that if a product lists “spices” in their ingredient list and they purchase bulk mixed spices from a supplier that adds MSG to their spice mix then the company that uses the spice mix does not have to claim that it contains MSG. So basically something can say it is MSG free but still may contain MSG if they have the word "spices" listed in the ingredients. If you have MSG sensitivities like my hubby does or you just want to avoid it for health reasons … read your labels carefully!
Taco mix is so easy to make. It takes less than 15 minutes to make up a batch, the recipe doubles easily. I usually make a double batch but today I did not have enough dried onion, so I settled for a single batch.
Bulk Taco Seasoning Mix

¾ c dried onions
½ c chili powder
¼ c salt
3T garlic powder
3T cornstarch
3T ground cumin
1T to 3T cayenne pepper (depending on how hot you like it)
Combine all ingredients in a bowl and mix well. Store in plastic or glass container with a lid.
It takes approx. 3T of this mix to equal one packet that you would buy in the store.
This recipe makes about 2 cups. I store it in a canning jar in my cupboard.

Bulk Whole Wheat Pancake Mix
Whole Wheat Pancake Mix
25 cups whole wheat pastry flour
1 ¼ cups baking powder
¼ cup salt
6 2/3 cups powdered milk
Combine all ingredients very well in a large bowl. Transfer to zip type freezer bags, label. Store in freezer to keep flour fresh.
To make one batch:
3 cups mix
2 eggs
¼ cup olive oil
2 cups water
Combine mix, eggs and olive oil. Add half the water, stir and only add enough of the remaining water to achieve the consistency you desire. Bake on a hot skillet. Serve with butter and real maple syrup! Yum!!
Variations:
Banana Pancakes:
Add:
1 cup mashed bananas (approx. 2 large bananas) to one batch of pancake batter.
Blueberry Pancakes:
Add:
1 cup fresh or frozen blueberries to one cup of pancake batter.
Chocolate Chip Pancakes:
Add:
½ to 1 cup chocolate chips to one batch of pancake batter.
Pumpkin Pancakes:
Add:
1t cinnamon
½ t ginger
To dry mix.
Add:
1 cup pureed pumpkin to one batch of pancake batter.
Trim the Budget: Breakfast Bargain
Trim the Budget: Breakfast Bargain
 Breakfast is a great meal to incorporate those low cost basic foods.. Grains make a nutritious and filling meal. I am always looking to simplify my weekday breakfast routine in my home. I like to get breakfast done and over with quickly so we can move onto the important issues of the day. One food my children like me to have on hand is Instant Oatmeal. I like to have it because I know they will get a good and filling breakfast quickly while making a minimal amount of mess in the kitchen while they are at it!
Today’s post will be on how to make your own instant oatmeal and a cost comparison of making your own to buying the little packets of Quaker Instant Oatmeal.
Bulk Instant Oatmeal (the recipe can be found HERE ):
Gather together your ingredients


Combine them with the other 10 cups of oats and add the powdered milk, cinnamon and salt


To make a serving combine ½ cup of the mix with 1 cup boiling water


Put something over the top of the bowl (I use a small plate) and let is sit for a few minutes

When it is done, stir and it is ready to serve

You can add your sweetener of choice and a little milk for a yummy, quick, hot breakfast 
Now for the cost:
I came up with these numbers:
$1.33 Powdered Milk
$2.09 Quick Oats (this was the price for the non organic oats)
The cost was $3.42
I did not calculate the cost of the cinnamon and salt but I don't believe it makes a significant change in the total amount.
At $3.42 I calculated this to cost 4 cents per ounce.
Compared to buying a box of 10 instant oatmeal packets (Quaker Oats brand, regular, no flavoring or sugar added, total weight for one box was 11.8 oz) at: $3.84 per box (generic brands could be cheaper) brings the cost to 32.5 cents an ounce. Even if you could find them cheaper the cost would still be very high compared to making it yourself.
One last note of interest, the store bought instant oatmeal also has MSG added to it. It is the second ingredient after oats. The sweetened types also have sugar added, the second ingredient after oats with the MSG following in 3rd place.
Homemade is not only way less expensive but much healthier as well!
Also If you are dehydrating your fruit my kids love to add dried apricots, or peaches, or stawberries, or cherries. The list is endless!!!!
Trim the Budget: Black Bean Sloppy Joes!
Trim the Budget: Black Bean Sloppy Joes!
Here is another meal that makes a large serving, tastes great, utilizes a low cost basic food (beans), and is delicious!!
Black Bean Sloppy Joes

Usually sloppy joes are made with all hamburger. That can be a lot of expense in meat. The last time I looked at Costco hamburger was $2.79 a pound. One way to still enjoy sloppy joes and save some money is to make Black Bean Sloppy Joes. The black beans stretch the hamburger while giving you a delicious and nutritious meal! You can find the recipe here:
Make sure to get your beans cooking in the morning so all you have to do come evening is assemble the rest of the recipe. This will also give you the afternoon to make the rolls to serve the sloppy joes on.
Making your own high quality bread products is also a good way to cut costs. White bread will always be dirt cheap, but with no nutritional value and not worth the cost.. no matter how cheap. Making homemade bread is one way to ensure better quality bread products in your home for a very reasonable price.
This was a new recipe I tried out for the dinner rolls. They were delicious!! I wanted a sub sandwich type bread that was soft and would make great sandwiches or could be used for recipes like sloppy joes. I was very happy with this one!
Sub

1½ cups water
½ cup honey
6T butter
½ cup oats
2t salt
1T yeast
2 eggs
5½ to 7 cups whole wheat flour
In a small sauce pan combine water, honey, butter and oats and heat over medium high until hot and butter has melted, do not boil. Pour this mixture into your Bosch or Kitchen Aid mixing bowl. Allow the mixture to cool for 15 to 20 minutes. When it is very warm, but not hot to the touch add the salt, yeast and eggs. Now begin adding flour. Add 5 ½ cups and then add a half cup at a time until the dough is no longer sticky, but still is a soft dough. Knead 4 to 5 minutes in a Bosch or
Let the dough rise for one hour. Punch down and knead again for a few minutes to remove air bubbles.
Divide dough into 10 pieces. Roll each piece into an 8 inch log. Spray a large cookie sheet or jelly roll pan with non stick spray. Lay the bread dough pieces on the cookie sheet and cover with a towel. Let rise until double in size, about 30 to 45 minutes.
Bake at 375 for 25 minutes.
To use for the Black Bean Sloppy Joe recipe I cut the rolls in half (lengthwise) and then sliced them in center (like you would if you were going to make a sandwich out of them). You can toast the bread first before topping with the sloppy joe mix. Serve the sloppy joes over the bread.
This meal is filling! It is big enough to easily serve 8 to 10 people. So if your family is smaller, you can freeze half of this for another night.
I feed 5 people and I will have left overs. I will serve the last of the sloppy joes to the family that is home today for lunch
Now for the budget cost breakdown.. I don’t calculate the costs of things like salt or a ½ of an onion.
Here is what I figured for last night’s meal:
Black Bean Sloppy Joes:
Hamburger: $2.79
Black Beans: .95
Ketchup: $1.08
6oz tomato paste: .90
Approx. cost: $5.72 or rounded up to $6.00
Dinner Rolls:
Honey: .91
Whole Wheat (I grind my own wheat so this is the cost of the actual wheat berries, not the cost of flour): .80
Oats: .05
Butter: .33
Eggs: .25
Approx. cost of rolls: $2.34 or rounded to $2.50
In the end, $8.50 fed my family a delicious, nutritious dinner plus I have leftovers. If I had wanted to stretch this meal out for two full dinner meals for my family I could have added another cup or two of cooked beans and a little of the bean broth to give it the right consistency. That would have increased the cost by just a few cents, and I may do that the next time I make this meal.
Monday, February 1, 2010
Pumpkin and other squashes
http://dehydrate2store.com/videos/?id=66
This is so cool and it works so awesome. I did some big banana squash that Paul Robinson gave us and and it is so great! Try it!
This is so cool and it works so awesome. I did some big banana squash that Paul Robinson gave us and and it is so great! Try it!
dehydrating potatoes
Great video on dehydrating potatoes!!!!!!!!!!
http://dehydrate2store.com/videos/?id=21
So handy!
http://dehydrate2store.com/videos/?id=21
So handy!
dehydrating
Recently I have been on a dehydrating kick. This is a wonderful thing to do especially in the winter time when it is cold outside and you aren't harvesting other things. I found a AWESOME website on how to dehydrate almost anything!!!!!!!!!!!!I will be sharing many of these things with you. Also many of her tips.
If you want to check out her site she has lots of how to videos that are great!
dehydrate2store.com
If you want to check out her site she has lots of how to videos that are great!
dehydrate2store.com
| Foods You Just Throw on the Dehydrator |
Oranges
Lemons
Limes
Collard Greens
Spinach
Mushrooms (If wet or soaked in water before dehydrating mushrooms will turn dark in color. They are OK to eat this way)
Parsley
Dill
All herbs
| Fruit Roll-ups |
MY KIDS LOVE FRUIT ROLL UPS!
Never use sugar in fruit rollups, the sugar will crystallize over time. Instead use honey or corn syrup.
When using zip bags to dry your fruit rollups make sure any print on the bag is facing away from the rollup. Otherwise, it will pull the print up when the rollup when removed.
I like to use duct tape when taping down the zip bag because it does not fall off in the dehydrator and it is easy to remove from the trays.
Shrink wrap makes a great package for the rollups when sealed using your sealer.
Also, the wax inserts in cereal boxes make a great package for fruit rollups.
Cooking the fruit in a sauce pan before dehydrating makes a translucent roll-up whereas uncooked makes a more firm and solid color roll-up.
INSTRUCTIONAL VIDEO
http://dehydrate2store.com/videos/?id=14
| Fruit Skins |
When peeling your oranges, mangos, papayas, apples, peaches, pears, and lemons place the skins on the tray with the skin side facing DOWN and dehydrate. After dehydrating most skins can be ground and put in homemade herbal teas, sauces, cookies, cakes, and breads.
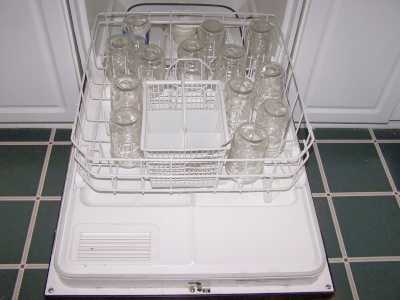
| Glass Jars |
I use my glass jars for short term storage. When they become empty I refill them with my items that have been vacuum packed, Mylar bagged, or oxygen packed. Don’t get me wrong , your food will last for a year and longer in the jars, but the issue is the light breaking down the food. If you place your jars in a dark area then your food will last virtually forever, so your biggest concern is light exposure over a long period of time. Years ago jar companies made a blue jar for canning to detour light. You can still find the blue jars (I have some) if you go to attic or garage sales. Three years ago you couldn’t even give them away (as with clear Masson/ Ball jars) but today you have to fight to get them. I would not recommend these old jars for canning due to safety reasons, but they are great for long term storage of dried foods.
| How Long Can You Store Dehydrated Foods? |
When stored properly and kept in a cool dry place your foods can last up to 30 years depending on the item.
I would recommend going to www.survivalacres.com and clicking on their dehydrated shelf life chart.
| Lemon Juice |
Whenever food is processed in any way nutrients are lost. For this reason it is important that you spray lemon juice on your carrots, apples, bananas, pears, strawberries, papaya or any low acid item before dehydrating in order to add extra vitamin C. This process will also help to retain the natural beautiful colors of your fruits and vegetables.
I spray lemon juice directly on the items instead of soaking them in a bowl. If you soak your bananas in the juice they will become soggy. Also, soaking food takes away important vitamins and minerals. If you put honey in the lemon juice, like some people suggest, I find that the bananas become sticky and soggy and after dehydrating they will stick together, which is not good. Also, when soaking in lemon juice there is a lot of waste when you toss the leftover juice down the sink. Spraying or misting with concentrated lemon juice is the best technique.
Things you do not want to spray with your lemon juice are green leafy produce like spinach or broccoli because it will brown or burn the items.
Pineapple juice is also a possible vitamin C rich liquid you may spray onto your foods before dehydrating. However, I recommend concentrated lemon juice because pineapple juice tends to make your dehydrated items more on the sticky side due to the excess sugars.
Foods that should be sprayed with concentrated lemon/pineapple juice:
(All your low acid fruits. This maintains color and adds a little extra vitamin C)
A MUST:
Apples
Banana
Pears
Strawberries
Apricots
IF YOU WANT:
Raspberries
Rhubarb
| Let's Talk About Drying Time |
It is very difficult to give an exact time frame for dehydrating foods because of all the variables. Humidity outside and in the home, thickness and type of cut, how loaded the trays are, and even different brands of produce play a big part in dehydration time. Also the type of dehydrator you use plays a large role. If the fan is on the top or bottom of your dehydrator it will take longer for the food to dry because the circulation of air flow is disrupted by the other trays. If the fan is in the back of the dehydrator (where it should be) your food will dry faster and more evenly.
What I can tell you is this:
You never want to increase the temperature to dry faster this will cause “case hardening”. This is when the outside of the food hardens and moisture is trapped on the inside and is unable to dry because it is incased in a hard shell. This will cause your food to sour and have to be tossed. Your best bet is long time and low temp. Never try to speed things up by increasing the temp in order to finish at a certain time. Regardless if I am doing a fruit or vegetable I never go over 125°F.
An average drying time list
8-15 hours All fresh vegetables including peppers
8-10 hours Frozen vegetables (remember to place on the tray while frozen )
8-10 hours Mushrooms and onions (sliced and chopped)
12-15 hours Sweet and white potatoes (thin sliced, chopped)
8-10 hours Fruits, very thinly sliced
12-15 hours Fruits ¼ inch slice
15 hours plus Fruit rollups (depending on how much corn syrup and honey used)
15-20 hours Grapes
18-20 hours Blueberries
Up to 2 days Whole prunes (remove pits)
12-15 hours Peaches, plums, pears, apples, nectarines, rhubarb
The most important part is not so much the length of time in the dehydrator, but the percentage of remaining moisture left. For long term storage you want to stay at 95% and above. Testing for dryness will be your best barometer. Your food should easily snap and should not be sticking together.
After, dehydrating your food place it in a zip-lock bag for a few days before storing away in your vacuum bags. This will give you a chance to see that your food has fully dehydrated. If your food appears limp you can put it back in the dehydrator again for a few more hours.
| Some Basics Before You Start |
Wash everything down with an anti-bacterial cleanser of your choice. Just like when canning foods, it is important to practice good hygiene while dehydrating as well. This ensures a good end product with a longer shelf life.
Wear latex or vinyl gloves!
There are natural oils and moistures in your hands which will contaminate your foods by reintroducing moisture. The whole idea to dehydrating foods is to maintain a good quality food with a long shelf life. Wearing protective gloves helps you obtain these goals.
Warm up your dehydrator
Air circulation helps eliminate the growth of contaminates, therefore it is best to start the dehydrator and get the air moving before putting your food in.
TIP: It is so much easier to cut your dehydrated foods with kitchen scissors instead of using a knife. Some of the dehydrated foods you can simply crumble in your hands.
| The Cannery |
The Church of Jesus Christ of Latter Day Saints (LDS) has canneries that you can go to and purchase Mylar bags and oxygen packs for very little money. You can also purchase wheat, oats, corn meal, beans and other dried foods and have it placed in #10 cans. The LDS members are very kind, willing to help, and very knowledgeable in food storage. You do not have to be a member to go to some of the canneries; however the canneries are non-profit and therefore run through tithing in the church. For this reason some locations require that you be a member to purchase from them. I recommend you call your local cannery and ask their policy prior to visiting. By going there you can build your pantry fast and for very little money. The Cannery is a smart tool in helping you build your pantry so please take advantage of it. If you are interested e-mail me the town or city you live in and I will try to find one in your area.
| Tomato Paste and Tomato Sauce Roll-Ups |
There several ways you can do tomato paste.
1) You can puree tomatoes that have been canned
2) You can use whole tomatoes and scald off the skin then puree
3) You can puree whole tomatoes with the skins on
4) You can pre-cook your puree as you would with fruit roll-ups or do it raw
A trick you can use to help remove water from the tomatoes is to put them in a clear gravy separator and place them in the refrigerator over night. The next day pour off the water that separated from the tomatoes. Your paste is now thicker and easier to make into a roll-up.
| Tricky Fruit Tips |
Blueberries
Place the blueberries in a pot of boiling water for about one minute. The information I received over the years said to place them on a paper towel and then on the dehydrator tray. Lately, I have been placing my dehydrator tray across the sink like a strainer and pouring the blanched blueberries over the top of the tray. The less you have to move them around the better. I found this makes a big difference and the berries don’t mush. I suggest adding cold water to the pot before pouring it over the dehydrator tray. After placing them on the tray I prick them one by one with a toothpick to let the air out. My Blueberries are done in about 18 hours. If you remove the tray and some blueberries are still large and soft or can be easily mashed in your fingers they are not fully dehydrated. Puncture another hole in them and place in the dehydrator longer.
Bananas
Always use a stainless steel knife when cutting your bananas, if you use a regular knife the finished product may be brown in color (These are still fine to eat, just aren‘t and appealing). Use concentrated lemon and lightly spray the bananas as soon as they are cut. Handle your fruit as little as possible. Test the banana to see if it is done by removing one slice and letting it cool for 5-10 minutes. The slice should be crisp and not sticky. Place them into a zip-lock bag for 2-3 days before packing. After a day, shake the plastic bag; if they are sticking together place them back in the dehydrator for 3 more hours. If the bananas are over ripe to begin with they may be on the chewy side after dehydrating. If the banana is somewhat green to begin it may turn a little pink in color after dehydrating, not to worry they are still good to eat. I have never had my sliced bananas encounter case hardening when the temp. was higher. Even so, I still keep my temp. at 125°F.
Raspberries
Try to keep your raspberries as dry as possible. Rinse, but do not soak, in water prior to dehydrating and wash minutes before dehydrating.
Papayas and Pineapple
Papayas and pineapple should both be steams prior to dehydrating if you are going to use them un Jell-O. Also I believe pineapple is better if steamed prior to dehydrating if you plan to use it in an upside down cake, breads, cookies, smoothies and so on. The only time I do not steam my pineapple before dehydrating is when I plan to grind it up in powdered form for teas and sauces. You can eat steamed or unsteamed dehydrated pineapple and papaya for a great on-the-go snack.
| When To Salt |
Remember to add salt AFTER everything is cooked. Salt slows down the re-hydrating process.
| Where NOT To Store Your Food |
You should never store your food on a concrete floor. Place it on a skid or elevate it off the floor so it is not directly on the concrete. Never place your stored food where the sun is beating down on it, by a furnace, or anywhere really hot.
| Winter |
Winter is great because the furnace is always going and it’s dry in your house. The down side is your garden is 3 feet under snow. The upside to winter is you can load up an all the produce that grocery stores put on sale to lure you in. How many people can load up on 10 lbs of carrots, bananas, etc.?
YOU CAN, because YOU have a dehydrator!
| Your Enemies in Long-Term Storage |
Water / moisture
Oxygen
Light
Heat
Rodents and bugs
| Blanching and Skin Scalding (which foods?) |
Blanching is when you place your food in boiling water for about one minute prior to dehydrating.
Why do you have to steam or blanch some items and not others?
Skin scalding occurs during the blanching process. Skin scalding is done to either soften the skin of a fruit or vegetable you want to dehydrate, or to soften the skin to allow for its removal. While blanching a grape, for example, you must blanch it prior to dehydrating in order to ‘skin scald’ or soften the skin. While blanching a tomato or peach, however, you will find the skins fall right off. By doing this it is possible to dehydrate your food without any unwanted skin or peach fuzz.
Food that should be blanched or skin scalded
Grapes
Tomatoes
Blueberries
Plum
Cherries
Peaches
Cranberries
Peaches
Pears
Summer Squash
Zucchini
Canning Dried Beans and soups
This time of year when we aren't canning our harvest is still a time you can be working on your food storage. These ideas are also frugal and helpful on your budget and time saving for those nights when you just weren't prepared!
I love being able to grab a quart of beans off my shelf to use instead of soaking and cooking them each time.
I got these directions off a wonderful canning site:
http://www.pickyourown.org
I love being able to grab a quart of beans off my shelf to use instead of soaking and cooking them each time.
I got these directions off a wonderful canning site:
http://www.pickyourown.org
How to Make Homemade Canned Dried Beans and Peas (from Lima Beans, Snap Beans, Pole Beans, Runner Beans, Cowpeas, Chickpeas, Peas, etc.)
Kidney, navy and other varieties of dried beans are good candidates for canning or storage. Of course, you can store the dried, too, but some people prefer them canned. In your own home garden, leave the beans on the vine to mature. They will dry naturally.
In canning the dried beans, there is a key tip: Water plays an important part in the final quality of canned beans. The harder the water used for soaking and blanching, the harder and firmer the finished beans. Also, excessive alkalinity will cause the beans to disintegrate somewhat, becoming soft and mushy. However, this will not be seen until after canning them. there's not much you can do about this, but try to avoid "softened" water.
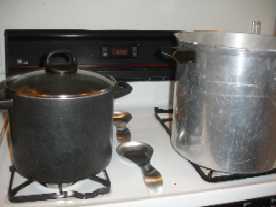
The only other trick is, you really do need a pressure canner. Every university food science department and the government will tell you that it just is not safe to use the water bath bath method; it takes the higher temperatures of the pressure canner to kill the botulism bacteria.
BUT, with a pressure canner it's easy. And although a pressure canner costs $100 to $200 (see this page for pressure canners models, makes and prices), they last a lifetime, and your children and grandchildren may be using it
Directions for Making Canned Dried Beans and Peas
Ingredients and Equipment
|
| |
Recipe and Directions
Step 1 - Selecting the dried beans or peas
The most important step! You need dried beans that are FRESH - not old to begin with! Remove and discard any soft, diseased or spotted beans.
How many dried beans or peas and where to get them
You can grow your own, pick your own, or buy them at the grocery store. About 14 pounds of beans makes 7 quart jars; or 9 pounds is needed per 9 pints. A bushel, which produces anywhere from 13 to 20 quarts, weighs 30 pounds. That works out to an average of 2 pounds of beans per finished quart jar.
Step 2 - Prepare the jars and pressure canner
Wash the jars and lids
This is a good time to get the jars ready! The dishwasher is fine for the jars; especially if it has a "sterilize" cycle. Otherwise put the jars in boiling water for 10 minutes. I just put the lids in a small pot of almost boiling water for 5 minutes, and use the magnetic "lid lifter wand" (available from target, other big box stores, and often grocery stores; and available online - see this page) to pull them out.
Get a large pot of water boiling
We will use this water to pour over the beans and fill each jar with liquid, after we've packed them full of beans. I use the largest pot I have, so that there is plenty of clean, boiling water ready when I need it.
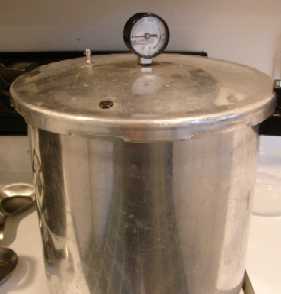
Get the pressure canner heating up
Rinse out your pressure canner, put the rack plate in the bottom, and fill it to a depth of 4 inches with hot tap water. (of course, follow the instruction that came with the canner, if they are different). Put it on the stove over low heat, with the lid OFF of it, just to get it heating up for later on.
Step 3 -Wash the dried beans or peas!
I'm sure you can figure out how to rinse the dried beans or peas in plain cold or lukewarm water.
Step 4 - Soak to Rehydrate the beans
You can use one of the following methods:
- Method 1. Place washed dried beans or peas in a large pot and cover with water. Soak 12 to 18 hours in a cool place. Drain and discard the water.
- Method 2. To quickly hydrate beans, you may cover washed beans with boiling water in a saucepan. Boil 2 minutes, remove from heat, soak 1 hour and drain. Discard the water.
Step 5 - Heat/cook the beans
Cover beans soaked by either method with fresh water and boil 30 minutes. Add 1/4 teaspoon of salt per pint or teaspoon per quart to the jar, if desired. Save the water you cook them in!
Step 6 - Packing the beans in the canning jars
Fill jars with beans or peas . Pack the jars evenly, but be sure to leave 1 inch of space at the TOP of the jar.
Step 8 - Pour boiling water into each packed jar
Fill the space around the beans to 1 inch from the top of the jar with the water you cooked the beans in. That 1 inch space is called "headspace" and is needed for expansion during heading. Use a ladle or pyrex measuring cup to carefully fill each packed jar with water from pot of boiling water. The beans should be covered and there should still be 1 inch of airspace left in the top of each jar. Be careful not to burn yourself, (or anyone else - children should be kept back during this step!)
Step 9 - Put the lids and rings on
Put the lids on each jar and seal them by putting a ring on and screwing it down snugly (but not with all your might, just "snug").
Step 10 - Put the jars in the canner and the lid on the canner (but still vented)
Using the jar tongs, put the jars on the rack in the canner. By now the water level has probably boiled down to 3 inches. If it is lower than that, add more hot tap water to the canner. When all the jars that the canner will hold are in, put on the lid and twist it into place, but leave the weight off (or valve open, if you have that type of pressure canner).
 Step 11 - Let the canner vent steam for 10 minutes
Put the heat on high and let the steam escape through the vent for 10 minutes to purge the airspace inside the canner.
 Step 12 - Put the weight on and let the pressure build
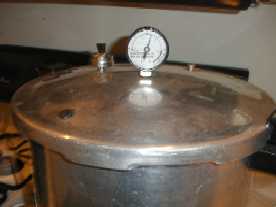
After 10 minutes of venting, put the weight on and close any openings to allow the pressure to build to 11 to 13 pounds in a dial-type gauge canner - shown in the photos (or at 10 to 15 pounds pressure in a weighted gauge canner.
Step 13 - Process for the required time
Once the gauge hits 11 pounds (or 10 pounds in a weighted gauge type), start your timer going - for 75 minutes for pint jars and quarts for 90 minutes. Adjust the heat, as needed, to maintain 10 pounds of pressure.
Pressure required depends on the altitude where canning is being done. Note: the chart below will help you determine the right processing time and pressure, if you are above sea level.
It is important to learn how to operate your pressure canner by reading the owner's manual that came with your particular canner. If you can not find your owner's manual, you can obtain find one online: Here is where to find some common manufacturer's manuals:
or by contacting the company that made your canner. Give the model number to the manufacturer, and they will send you the right manual. More notes on pressure canners from Colorado State University.
| Recommended process time for Dried Beans in a dial-gauge pressure canner. | |||||
| Minimum Canner Pressure (PSI) at Various Altitudes | |||||
| Jar Size | Process Time | 0 - 2,000 ft | 2,001 - 4,000 ft | 4,001 - 6,000 ft | 6,001 - 8,000 ft |
| Pints | 75 min | 11 lb | 12 lb | 13 lb | 14 lb |
| Quarts | 90 | 11 lb | 12 | 13 | 14 |
Step 14 - Turn off the heat and let it cool down
After 75 minutes for pints, 90 minutes for quart jars, turn off the heat and let the canner cool down. After the pressure drops to zero (usually, you can tell but the "click" sound of the safety release vents opening, as well as but the gauge. Wait 3 more minutes, then open the vent or remove the weight and allow the steam to escape.
Step 15 - Remove the jars
Lift the jars out of the water and let them cool on a wooden cutting board or a towel, without touching or bumping them in a draft-free place (usually takes overnight), here they won't be bumped. You can then remove the rings if you like. Once the jars are cool, you can check that they are sealed verifying that the lid has been sucked down. Just press in the center, gently, with your finger. If it pops up and down (often making a popping sound), it is not sealed. If you put the jar in the refrigerator right away, you can still use it. Some people replace the lid and reprocess the jar, then that's a bit iffy. If you heat the contents back up, re-jar them (with a new lid) and the full time in the canner, it's usually ok. You're done!
Other Equipment:
 From left to right:
- Jar lifting tongs
helpful to pick up hot jars - Lid lifter
- to remove lids from the pot
of hot water - Lid
- disposable - you may only
use them once - Ring
- holds the lids on the jar until after
the jars cool - then you don't need them - Canning jar funnel
- to fill the jars
Frequently Asked Questions
Q. Is it safe to can dried beans or peas in a traditional water bath? If so how long do you do process them?
A. The answer, quite simply is no. Quoting from the Ohio State University Extension's Fact Sheet:
"Pressure canning is the only safe method for home canning vegetables. Clostridium botulinum is the bacterium that causes botulism food poisoning in low-acid foods, such as vegetables. The bacterial spores are destroyed only when the vegetables are processed in a pressure canner at 240 degrees Fahrenheit (F) for the correct amount of time.Clostridium botulinum is the bacterium commonly found in vegetables and meats. It is harmless until it finds itself in a moist, low-acid, oxygen-free environment or a partial vacuum. Under these conditions, the bacterium can grow and produce toxins dangerous to people and animals.
Do not process (low acid) vegetables using the boiling water bath because the botulinum bacteria can survive that method.
And Clemson University provides these questions and answers:
Can fruits and vegetables be canned without heating if aspirin is used? No. Aspirin should not be used in canning. It cannot be relied on to prevent spoilage or to give satisfactory products. Adequate heat treatment is the only safe procedure.Is it safe to can dried beans or peas in a boiling water bath if vinegar is used? No. Recommended processing methods must be used to assure safety. Recommended processing times cannot be shortened if vinegar is used in canning fresh vegetables. (This does not refer to pickled vegetables.)
Salt and sugar are not preservatives for vegetables: they are added to stabilize and improve flavor, but will not prevent spoilage.
Salicylic acid is also NOT a preservative. The University of Illinois reports:
Using Aspirin for Canning
Several years ago, a recipe circulated using aspirin to acidify tomatoes and dried beans or peas for canning. Aspirin is not recommended for canning. While it contains salicylic acid, it does not sufficiently acidify tomatoes or dried beans or peas for safe hot water bath canning. dried beans or peas are low acid foods and may only be processed safely in a pressure canner. Lemon juice or vinegar is recommended to acidify tomato products for safe water bath processing.
Think of it like smoking. We all know someone who smoke their entire life and lived to be 90. But the cemeteries are filled with the vast majority who didn't. You'll hear people say "my grandmother did it that way for 20 years". But of course, the people who died from food poisoning aren't around and often didn't have descendents to tell their tale...
Pressure canners!
If you want to can low-acid foods such as red meats, sea food, poultry, milk, and all fresh vegetables with the exception of most tomatoes, you will need a pressure canner. These foods fit into the low acid group since they have an acidity, or pH level, of 4.6 or greater. The temperature which must be reached and maintained (for a specified amount of time) to kill the bacteria is 240 F. Pressure canning is the only canning method recommended safe by the U.S.D.A. for low-acid foods such as vegetables, meats, and fish. Ordinary water bath canners can only reach 212 F and can not to kill the types of bacteria that will grow in low acid foods. This temperature can be reached only by creating steam under pressure as achieved in quality pressure canners.
There are several manufacturers of pressure canners. The two leading ones are Presto and All American (Wisconsin Aluminum). They are more expensive than water bath canners, but extremely well built - I bought mine in 1988 and it still looks and works like new!
| |
Subscribe to:
Comments (Atom)